I will be drawing stacking tables with proper lighting conditions in this lesson. This lesson will gel all of the concepts and laws learnt so far.
- Begin with a foreshortened square.
- Draw two short edges to create the top of the table.
- Draw the middle line longer, according to the foreshortened square concept.
- Using the lines you have already drawn as areference, draw bottom of the table top in direction of Northeast and Northwest.
- Draw middle line longer to create the near edge of the table post.
- Draw the sides of the table post. Each side line is drawn halfway from the far edge to the middle line.
- Using lines drawn as reference, draw the bottom of the table post in direction NW and NE.
- Draw horizon line just above the table. and position light source aboce and to the right. The horizon line tells our eye that the object is below the horizon line, which communicates to our brain that the thickness, shadows, and foreshorteneing are from this perspective.
- Place a guide dot directly below the near corner of the table post. If you don’t use the guide dot on every stacked table, your drawing may get progressively more skewed and impossibly distorted.
- Using lines already drawn as a reference, draw the front edge of the pedestal in directions NW and NE.
- Now draw the back edges of the opt of the pedestal, be sure to go behind the corner of the post.
- Complete the pedestal, makjing sure to draw the near corner lower. As always, use the lines you have already drawn as reference angles for drawing the bottom lines of the pedestal in directions NW and NE.
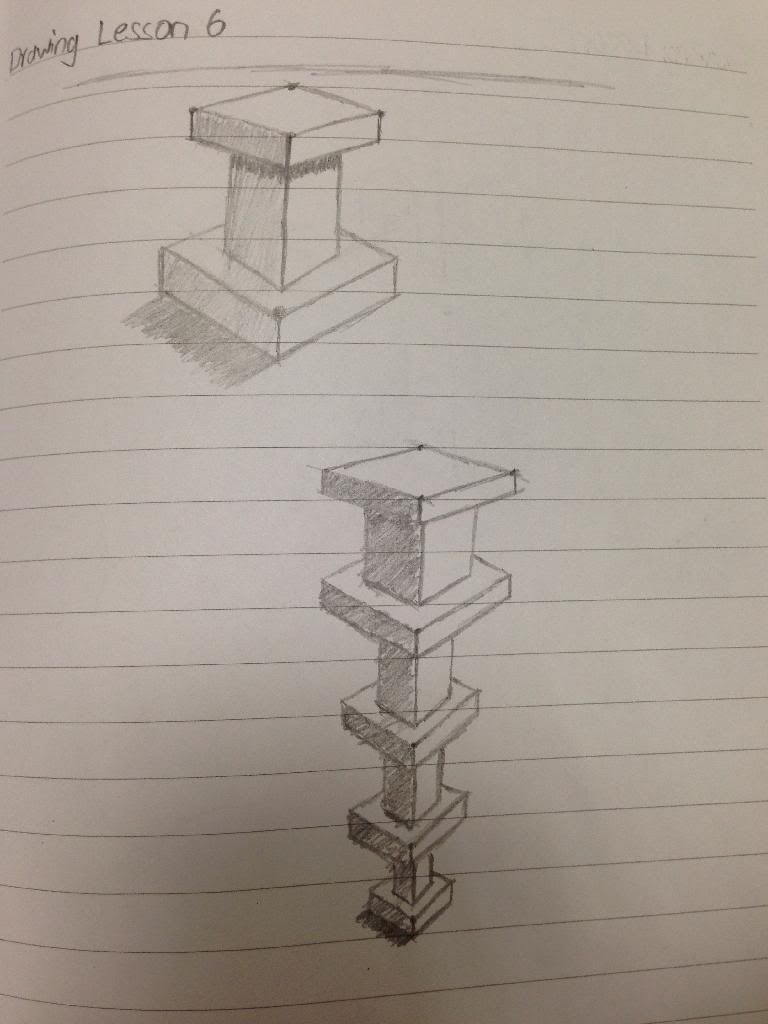
- Finally, add the cast shadow opposite your positioned light source, shade the table and pedestal and add the dark undershadows of both sides of the post.
So here’s how my final drawing looks: