In this lesson we are going to draw three-dimensional cubes. We are also going to build on it by drawing advanced shapes.
- Use guide dots to draw a foreshortened square.
- Lightly draw the sides down, and draw the middle line longer.
- Then draw the bottom of the cube using the lines you have already drawn as a reference. Go ahead and extend all of your direction NW and NE lines out as a guide.
- Draw the guide dot just below the near corner. This guide dot determines the angle of your foreshortened second layer. If your guide dot is placed low, it will distort the layer and throw the entire building out of alignment.
- Using lines drawn as a reference, draw the near edges of the second tier in NE and NW.
- Look at your NE angle at the top foreshortened square of your box. Now, take your pencil and trace over those direction lines lightly to embed the angle of the line into your hand memory. Repeat the same technique to draw the NW line on the other side to create the top of the second layer of the building.
- Complete the second layer of the building. Double check your bottom lines against drawing compass direction arrows NW and NE.
- Begin drawing the doors on the top level with two vetical lines on each side. To make sure your lines are actually vertical, straight up and down, look at the edge of your paper.
- Curve the tops of both doorways on the top floor of the building.
- To create the illusion that these doors actually exist as 3 dimensional entrances to this building, we need to add thickness to them. If the door is on the right, the thickness is on the right. If door is on the left, the thickness is on the left.
- Complete the door by following the line of the exterior door as it curves up.
- Look at the door on the left side. Using the drawing compass direction NE lines you drew earlier as reference, draw the thickness on the left-side door on the left side of the entrance.
- Erase your side lines at the bottom of each door. With a well placed line in drawing directions NW and NE, you can easily create the visual illusion that there is a hallway or a room inside each doorway.
- Let’s create ramp on the left side first. Draw the vertical back edge of the ramp against the wall, and extend the bottom edge of the ramp out in drawing compass direction SW.
- Draw the thickness of the ramp with two lines in direction NW, matching the angles with the linesyou drew earlier in direction NW.
- Complete the far edge of the ramp by matching the angle of the front edge.
- Erase guide lines behind the ramp. Using the lines you already drew in direction NE as reference, draw the ramp on the right side.
- Complete your two-layered foreshortened ramp building by drawing the horizon line above the building, positioning your light source, and shading all the surfaces opposite your light position. Using your reference lines to angle the cast shadow correctly direction SW is really simple when you are drawing buildings; just extend the bottom lines. We are done!
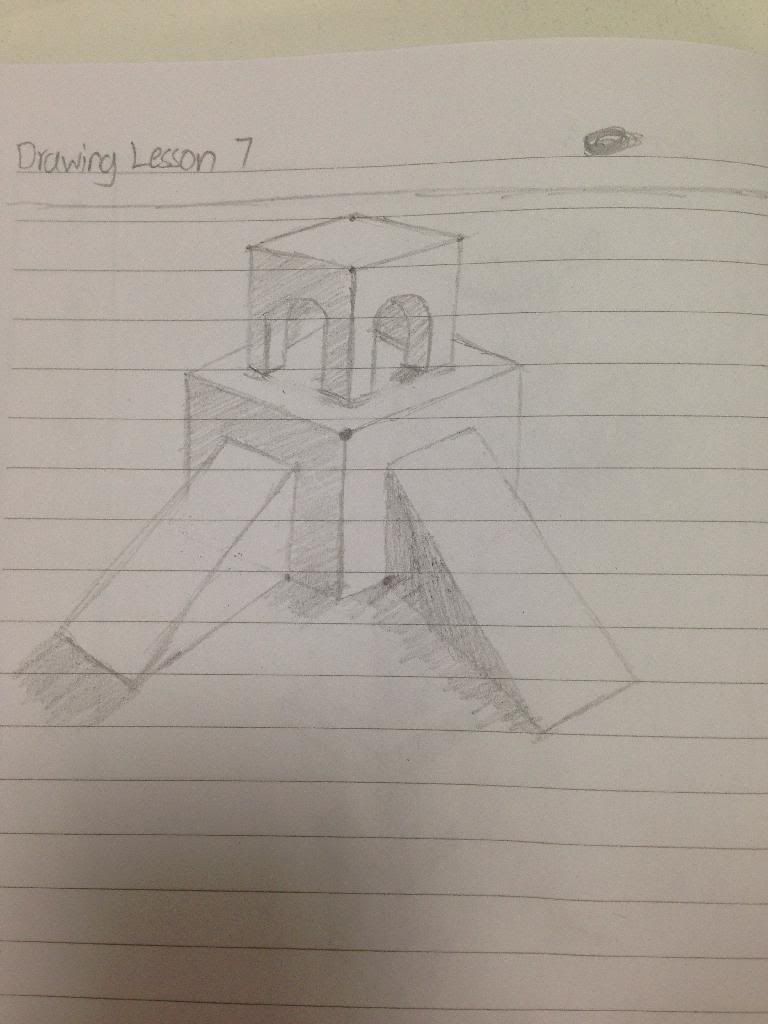
Here’s how my piece looks like: