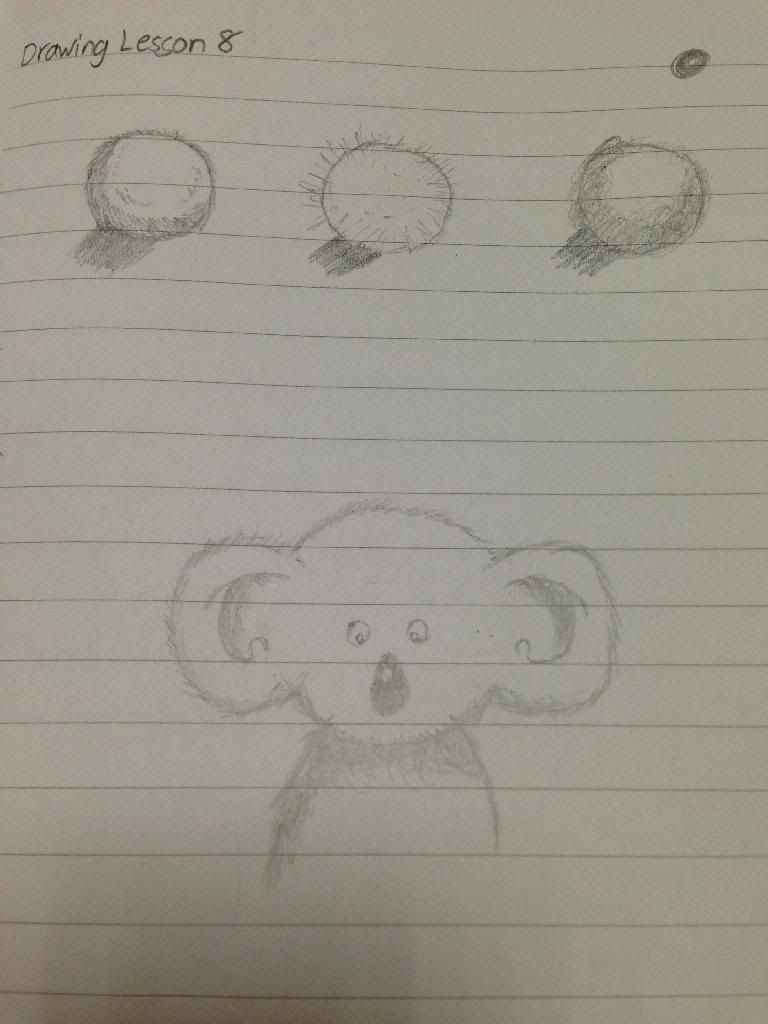
Let’s take a break from boxes and structures and draw a koala bear.
- Lightly sketch three circles in a row.
- On the first circle, use curving dashes to create a “soft fur texture along the outside edge”.
- Continuing to work on the first circle, use more curving dashes to fill in the left side of the circle, creating the illusion of shading with texture. You can use texture to shade an object.
- Let’s take this one step further. On the second circle, draw sharp lines around the outside, creating the feel of sharp spikes.
- Place the light source in the top right corner of your page, and add a few more rows of spikes to the left side of the shape.
- Draw scribbles around the third circle. Keep scribbling more circling lines around and around the shape to create a messy-looking ball of dryer lint. Continue to explore this idea of texture as a tool for shading.
- Now its time to start drawing the Koala. Begin with a light circle.
- Lightly sketch in the ears.
- Lightly slope down the shoulders
- When you draw the “tapered nose, be sure to leave a small white area”. This create the illusion of a light reflection off the shiny nose. You will do this same thing when drawing other animals, cats dogs etc.
- Draw the koala’s eyes, transferring the idea of reflection by leaving a small white spot in each pupil.
- Let’s take closer look at the ear. This is what is known in the art world as doing a study of a small portion of a picture.
- Draw the overlapped line of the “concha”.
- Draw the bump at the bottom of the aer. This is the “tragus”
- Now Repeat this ear structure on the right ear.
- Look back at the furry ball you drew at the beginning of this season. Notice how you created the soft feel of fur as ompared to the sharp feel of the spike ball. Draw the soft, furry texture around the outline of the koala.
- Use more furry texture to shade the koala’s head, ears, and body. Emphasize the undershadow under his chin and in his ear under the top helix line.
Here’s how my final drawing looks like: