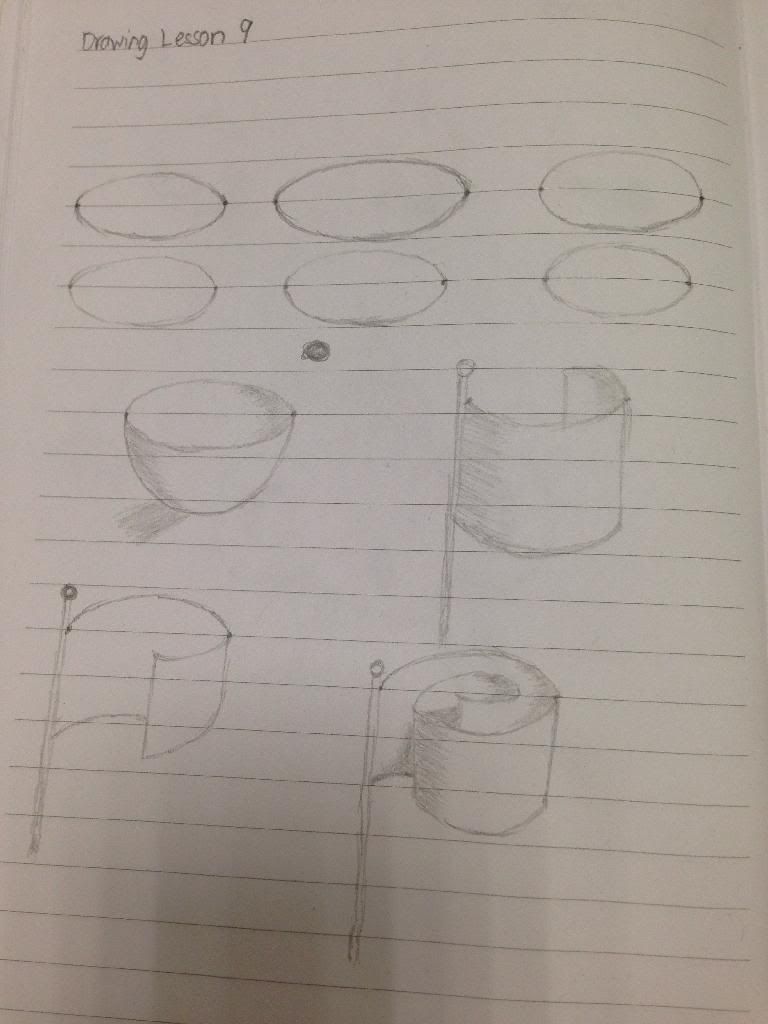
We will warm up for the rose by drawing simple shapes. It is always good to warm up by drawing serveral simple basic shapes.
- Draw two guide dota horizontally across from each other.
- Connect the dots with a foreshortened circle.
- Draw the body of the bowl.
- Using a guide line in direction SW, position the light source in the top right. Shade the bowl with blended shading from drak to light, creating a smooth blended surface.
- Before drawing the rose, let’s try drawing the “peeking” line. This tiny detail of a small overlapping line that defines a fold or a wrinkle will have a huge visual effect in enabling you to make the rose petals appear to be curling around the bud in three dimensions. 5a. Draw a vertical flagpole. 5b. Draw two guide dots. 5c. Draw three-quarters of a foreshortened circle. 5d. Draw the vertical thickness of the flag. 5e. Curve the near bottom edge of the flag a bit more than the line above it. The bottom of the flag is a bit farther from your eye, so you need to distort it, curve it more than the top edge. 5f. Draw the “peeking” line, the most important line in this exercise. This teeny tiny dash will make or break the drawing and holds an enormous amount of visual power.
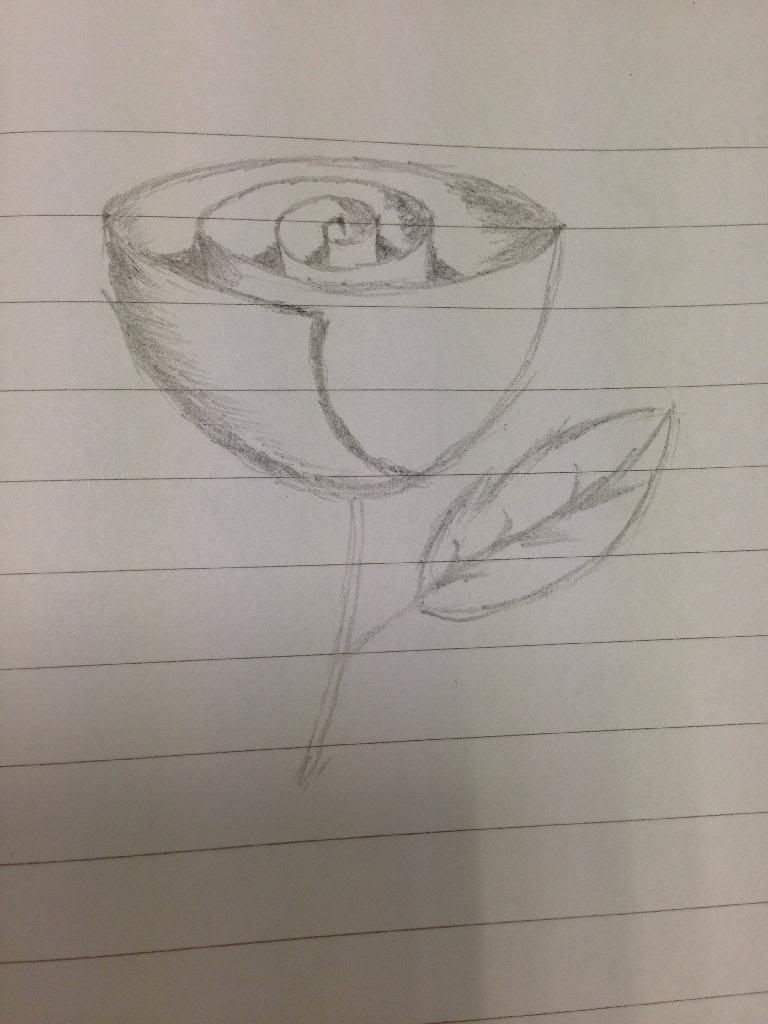
Let’s finally get to drawing a rose.
- Draw a foreshortened bowl, and add a stem.
- Draw a guide dot in the middle of the rose bowl.
- Begin to spiral out the rose petal with three-quarters of a foreshortened circle.
- Keep spiraling, and keep these spiraled foreshortened circles squished. It’s the distorted shape that will form the 3 dimensional rosebud.
- Complete the spiral at the center of the petal. Erase the extra line.
- Draw the center thickness of the rose petal and the first peeking thickness line.
- Draw the next outer peeking line.
- Draw the remaining thickness line. There it is, depth focused on our beautiful rose.
- Draw the very dark, very small, nook and cranny shadows. Notice i even darkened a shadow along the edge of the rose petal.
- Place the light source in the top right, and blend the shadin on each of the curved surfaces opposite. Draw a few thorns on the stem, and draw the leaves.
Here is my work!